

How to Wrap a Gift
Wrapping Presents Sucks (But Maybe We Can Make It Suck A Little Less)
It’s that time of the year again, where candy canes pop up throughout every store and lines to see Santa loop through the mall. If you listen closely, you can hear the magical sound of snow falling… that is, if you can hear over the sound of your frustration when it comes to wrapping presents for this holiday season. Have no fear! That’s what we are here for. Finding the perfect present is hard enough, there is no reason you should have to stress over how to wrap it as well. The look on their face when they open the present to they got exactly what they were hoping for makes learning how to wrap that perfect present worth it. Below are four ways to wrap your presents this holiday season, each with varying amounts of time needed. Don’t worry, if you’re in a rush, just skip to method number 4!
Prepping Your Present and Space
The first steps, no matter how you are planning to wrap your presents, are; to take off the price tag, find a nice box to place the item in and find a flat surface to work on. Make sure you are not in an uncomfortable position. Being uncomfortable will only add to your frustration in wrapping. Working at a table that is too high inhibits you from reaching over the present the way you need to. But, if you are on the floor, the ground may be uneven or even carpeted, making it difficult to cut the wrapping paper. A lot of people take out a folding table to set it up as a gift wrapping station for the day. This method is great to make sure your wrapping ends up as perfect as the perfect gift deserves.
Method 1: Wrapping a Gift for People With Ten or More Minutes
This is going to be the fanciest way we talk about when it comes to wrapping your gift. That means it will take the most amount of time. However, it will also be the most rewarding as this wrapping technique is gorgeous.
What You Need:
- Wrapping paper – To measure out your paper, make sure the box has enough room to fit across at least three times width-wise. Height-wise, the paper should just reach the top of the box on one side while folding over to halfway up the box on the other. Remember, it is better to have too much paper than too little! You can always cut more away.
- Scissors – Make sure they have a comfy handle – so your hands don’t get sore while wrapping!
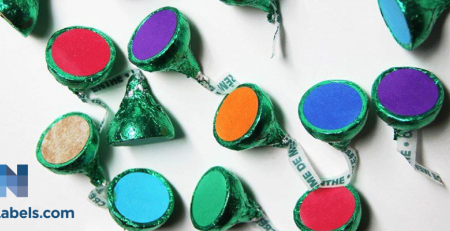
- Clear seals – These clear seals are the perfect way to wrap presents as you no longer have to worry about ripping tape off the roll. They peel and apply easily every time! Plus, they are ultra-clear – so when placed on packages, they practically disappear.
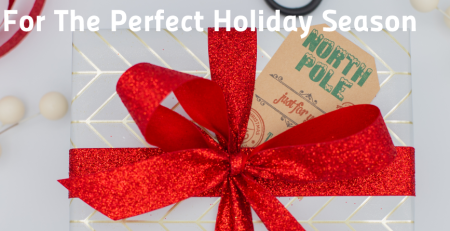
- Holiday tag stickers – At InStockLabels.com, we have tons of options for holiday tag stickers – so you never have to worry about tying a holiday tag on again!
How To:
Step 1: Measure out the paper

Step 2: Fold paper halfway up the box

Step 3: Crease paper diagonally from the box


Step 4: Fold diagonal creases toward the box on both sides


Step 5: Fold those creases onto the box, overlapping the previous creases


Step 6: Use a clear seal on the center of the box where the two papers come together (so clear you can’t even see it in the picture!)


Step 7: Flip box so open end is up

Step 8: Push from both sides of the paper down to the box and crease ends into triangles

Step 9: Fold tips of triangles down

Step 10: Flatten ends onto the top of the box and secure with a clear seal

Step 11: Add a holiday tag sticker and address it!

Method 2: For People With Five Minutes
This next method is the classic gift wrapping look that you see under all your favorite Christmas trees. However, we are here to help you perfect it! Plus, if you are on a slight time crunch, this is the perfect way to make your present look professional in a short amount of time.
What You Need:
- Wrapping paper – To measure out your paper, make sure the box has enough room to fit across at least three times width-wise. Height-wise, whatever the wrapping paper is already should be fine, simply cut excess off when wrapping. Remember, it is better to have too much paper than too little! You can always cut more away.
- Scissors
- Clear seals
- Holiday tag stickers
How To:
Step 1: Measure the paper (if it is a small gift, feel free to cut away some of the height of the wrapping paper – so it is easier to work with)


Step 2: Fold one side of the paper halfway over the box and secure it with a clear seal

Step 3: Bring the other side of the paper over the box and secure with clear seal (Riley Tip: Always have plenty of seals on hand to make sure the box is sealed well with crisp corners!)

Step 4: Crease corners of paper diagonally on top of the present

Step 5: Fold points of triangles down to create a straight line

Step 6: Secure one side on the top of the present with a clear seal

Step 7: Repeat steps 4-6 on the other open side.

Step 9: Add a holiday tag sticker to spice up the package

Method 3: For people With 1 Minute
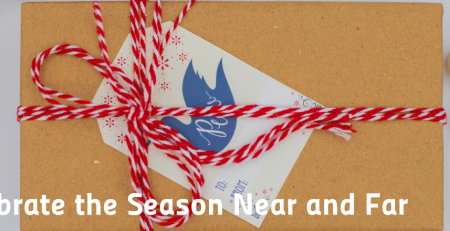
Who says the perfect wrapping needs to come with wrapping paper? Here at InStockLabels.com, we are a stan for throwing gifts in a bag and calling it a day. Add a bow and some tissue paper, and that is all the better!
What you need:
- Gift bag
- Tissue paper (2 (or more) different colors)
- Holiday tag stickers
How To:
Step 1: Loosely wrap the gift in tissue paper (nothing fancy, just cover it)
Step 2: Place the gift into the bag
Step 3: Place two different (but complimenting) colors of tissue paper over the present – so they stick out of the bag in a fluffy bunch
Step 4: Tie a ribbon around the handles of the bag like you are tying your shoes but keep the two ends of the string longer than the bow
Step 5: Add a holiday tag sticker!

Method 4: For People Who Just Rang the Doorbell To The Party and Realized They Forgot To Wrap The Gift Their Spouse Asked Them Five Times To Do (we’re here for you)
This is actually our favorite method. Simply grab one of our holiday tag stickers and place it on the gift. Our labels are spicy enough that you don’t even need anything else. Besides, don’t tell the other three methods this… but the wrapping paper and gift bags just get thrown out anyway! This method is the most environmentally friendly, most cost-effective, quickest to do, and the easiest for someone to “open.” Yes, we are just giving you excuses to tell your spouse. Now, take them and run!
What You Need:
How To:
Step 1: Place and address holiday tag sticker on gift
Step 2: That’s it! You are done.

Who We Are at InStockLabels.com
InStockLabels.com is based in Salt Lake City, Utah. All of our products are made in the U.S.A. If you are on a time crunch, these labels will work out great as all orders purchased before 1 PM MST (Monday-Friday, excluding holidays) ship out the same day. Then it only takes a few days for them to get to you (depending on how far you are).
Contact us if you have any questions or would like a sample of these labels to make sure they fit your needs. We also make custom labels if you can not find the perfect sticker for what you need. These wrapping techniques will be the talk of the party! If you are looking for some fun gift ideas, be sure to check out our “What to get somebody that doesn’t want anything“ blog.


Comment (1)
[…] where you’re going. Wrap it up for them to open. We have a great blog post to explain fun ways to wrap presents because this year, we are all about making sure you have the least amount of stress for the holiday […]