Remove Labels Easily With This Simple Hack
To remove the label without leaving a sticky mess, grab a hairdryer, warm up the label for 20–30 seconds, then peel slowly from one corner, most labels lift cleanly with no goo left behind.
Quick, easy, and surprisingly satisfying. If you’ve ever stood at the sink scratching stubborn sticker residue off jars, you’ll love how simple this is.
Why Labels Stick So Stubbornly
Most labels use pressure-sensitive adhesives that bond tightly to surfaces like glass, plastic, or metal. Over time, or with heat and humidity, they grip even harder. That’s why pulling them off cold often leaves torn paper or a gummy layer that collects dust.
The trick is to soften the adhesive before you peel, and you don’t need fancy chemicals or hours of soaking.
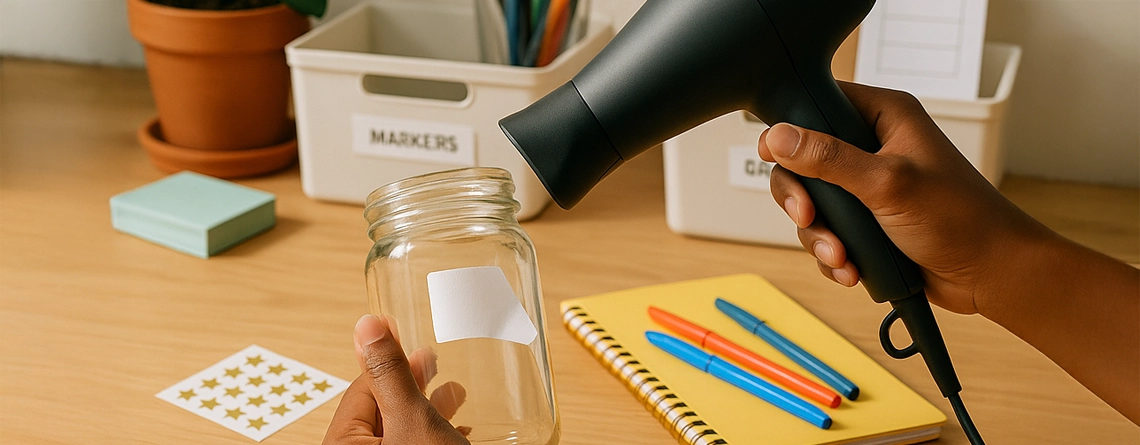
The Hairdryer Hack (Fast & Easy)
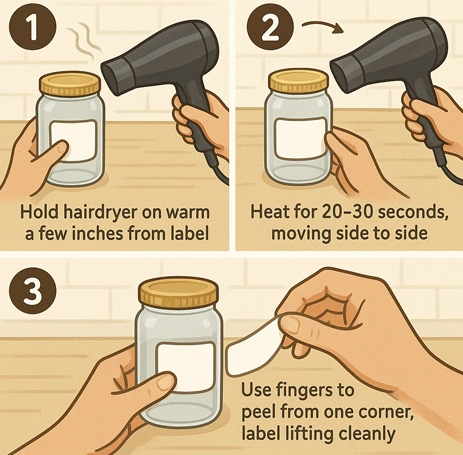
Your secret weapon? A hairdryer. Here’s how:
- Set it on warm (not hot) and hold it a few inches from the label.
- Heat for 20–30 seconds, moving slowly back and forth.
- Start at one corner and peel gently.
- If it resists, reheat for 10 more seconds.
This works on:
- Glass jars (perfect for upcycling)
- Plastic storage bins
- School supply boxes
- Metal tins
When Heat Isn’t Enough: Try Soapy Soaks
Some older or super-sticky labels might need a little more. Fill a sink or bowl with warm water, add dish soap, and soak the item for 15–30 minutes.
- For glass or metal, labels usually float right off.
- For plastic, check that the material can handle warm water without warping.
Pro tip: Add a splash of vinegar to help loosen extra stubborn adhesives.
Dissolvable Labels Make Removal Instant
If you label things often, like craft bins, pantry jars, or back-to-school organizers—consider starting with dissolvable labels instead. They hold firmly during use, but vanish with a quick rinse in warm water.
Here’s why it’s a game-changer:
- No hairdryer or scrubbing required
- Great for seasonal organizing or temporary storage
- Safer for kids’ supplies—no harsh adhesive removers needed
Read more on what dissolvable labels are used for.
School Prep Tip: Clean Up Old Labels Before Reuse
Before you re-label old bins or boxes for the new school year:
- Remove last year’s stickers completely.
- Wipe down any leftover stickiness with rubbing alcohol.
- Let containers dry fully before applying new labels.
This keeps your labels sticking where they should and helps everything look neat for the first day of school.
A Few Things to Avoid
- Don’t scrape with metal tools—they can scratch or gouge your surface.
- Don’t use boiling water on plastics—it can warp them beyond repair.
- Don’t yank labels off cold—this often leaves a torn mess.
Give Supplies a Clean Slate (and a Fresh Finish)
Once you’ve removed old labels from supply boxes, bins, or jars, add a finishing touch to make your organization stick.
A small reward like gold, silver and bronze star stickers can mark completed projects or color-code your newly cleaned containers—making back-to-school prep smoother, faster, and more fun for everyone.
Remove Labels Easily FAQs
Use a hairdryer on warm for 20–30 seconds, then peel slowly from a corner.
Apply a small amount of rubbing alcohol or cooking oil to a cloth and wipe away the residue.
Yes—adding vinegar to warm, soapy water can help dissolve stubborn adhesives, especially on glass or metal.
Absolutely! Just make sure any leftover residue is cleaned so new labels stick properly.
Dissolvable labels stay in place during use but rinse off easily with warm water, leaving no mess behind. They’re perfect for temporary or frequently changing labels.